The Definitive Guide to Pladur Profiles and Accessories: The Hidden Skeleton of Your Renovation
Understand the metal framing that supports every drywall partition or ceiling and avoid the most common installation mistakes.
When you think of drywall you probably picture the gypsum board: that white or coloured panel (green, pink...) you can see and touch. That’s normal, it’s the visible part. However, what really guarantees a straight, solid wall with no cracks is the metal framing. It is the hidden skeleton that holds everything together.
If Pladur were a car, the boards would be the paintwork, but the framing would be the chassis. You can have the shiniest paint in the world, yet if the chassis is poorly assembled the car will rattle, twist and become unsafe. Drywall works exactly the same way.
As professional installers we often meet people who get lost with the terminology: channels, studs, main profiles, hangers… This guide is for you, whether you’re planning a renovation or you’re a DIY enthusiast who wants to get things right.
Step one: wall or ceiling?
Before choosing any profile, decide whether you are building a partition (wall) or installing a suspended ceiling. Although some profiles look similar, the structure that hangs from the slab is not the same as the one resting on the floor.
1. The skeleton of walls (partitions and linings)
To build a new wall or line an existing one you need two profiles that work together: channels and studs.
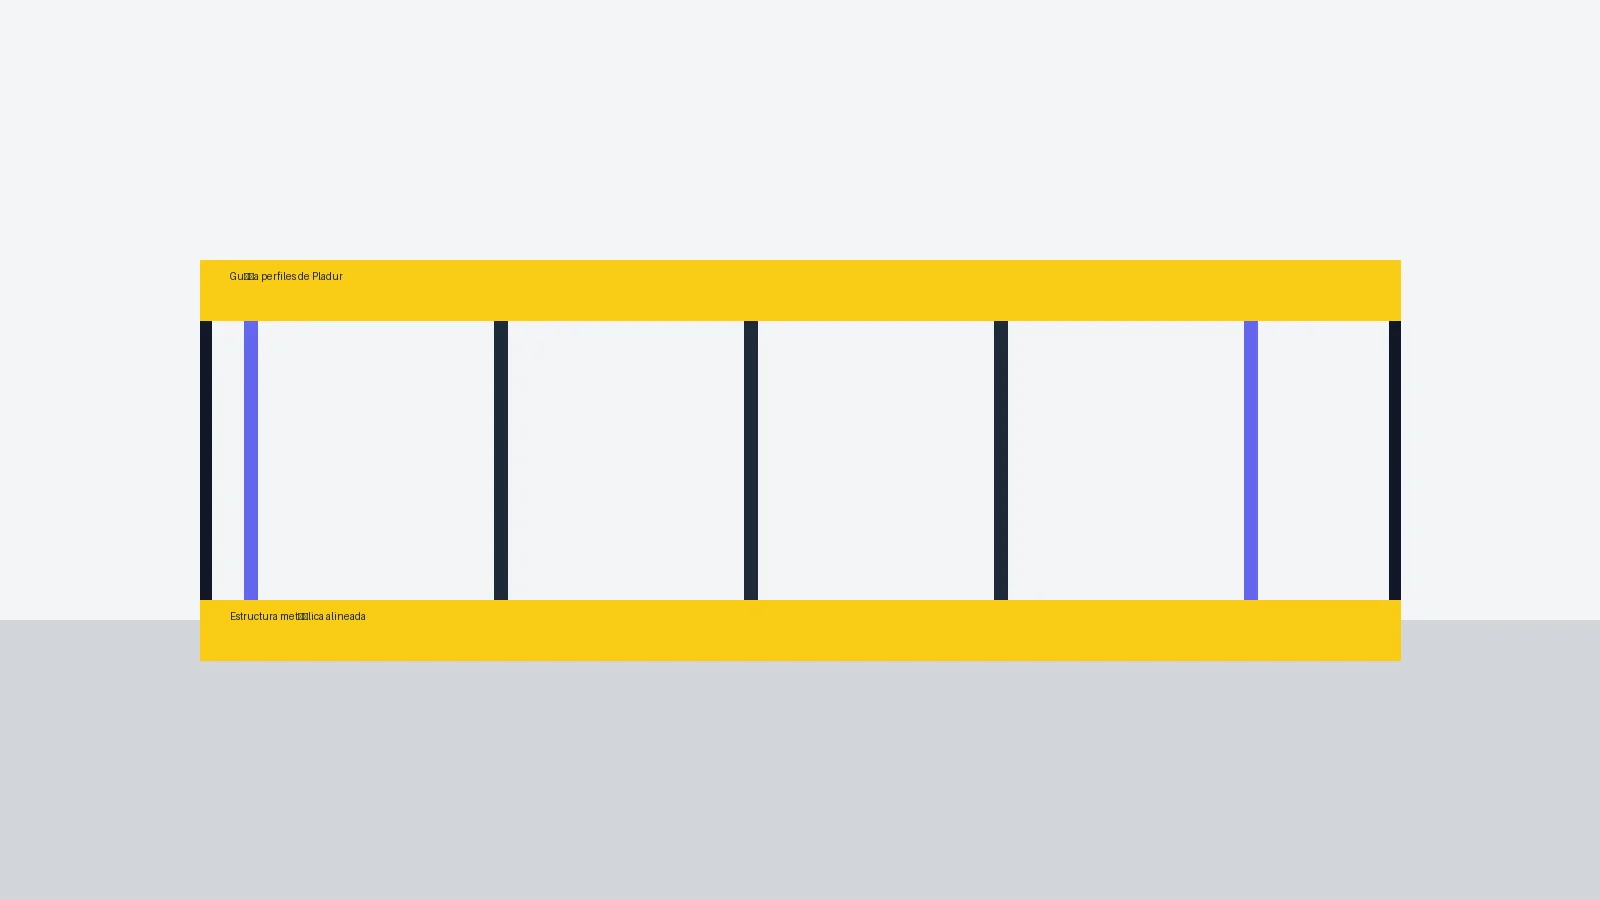
Channel profiles (the “U”): canal pladur
Think of the channel as the guide on the floor and ceiling. It’s a U-shaped metal profile screwed to the slab and ceiling to mark the exact layout of the new wall.
- Purpose: trace the wall line and receive the studs.
- Installation: set them perfectly plumb. Studs slot into the top and bottom channels.
Channel 48 or Channel 70?
The numbers (48, 70) indicate the width of the profile in millimetres. Choosing the right one is what separates a basic wall from a professional build.
Channel 48 + stud 46
The standard choice. With 13 mm boards on each side you end up with a wall about 7.5 cm thick. Ideal for simple partitions.
Channel 70 + stud 68
Our professional recommendation. The extra space allows comfortable routing of services and thicker insulation (6-7 cm mineral wool). Perfect for separating bedrooms, bathrooms or noisy areas.
2. The skeleton of suspended ceilings
A suspended ceiling doesn’t rest on the floor: it hangs from the structural slab. That’s why the profiles change and hanging accessories come into play.
Perimeter angle: angulo pladur
This L-shaped profile is fixed around the entire perimeter. It sets the finished height and supports the edges of the main profiles.
Main profiles: maestras pladur
These are the load-bearing members of the ceiling. They work like beams: supported by the perimeter angle and spaced roughly every 100-110 cm to carry the boards.
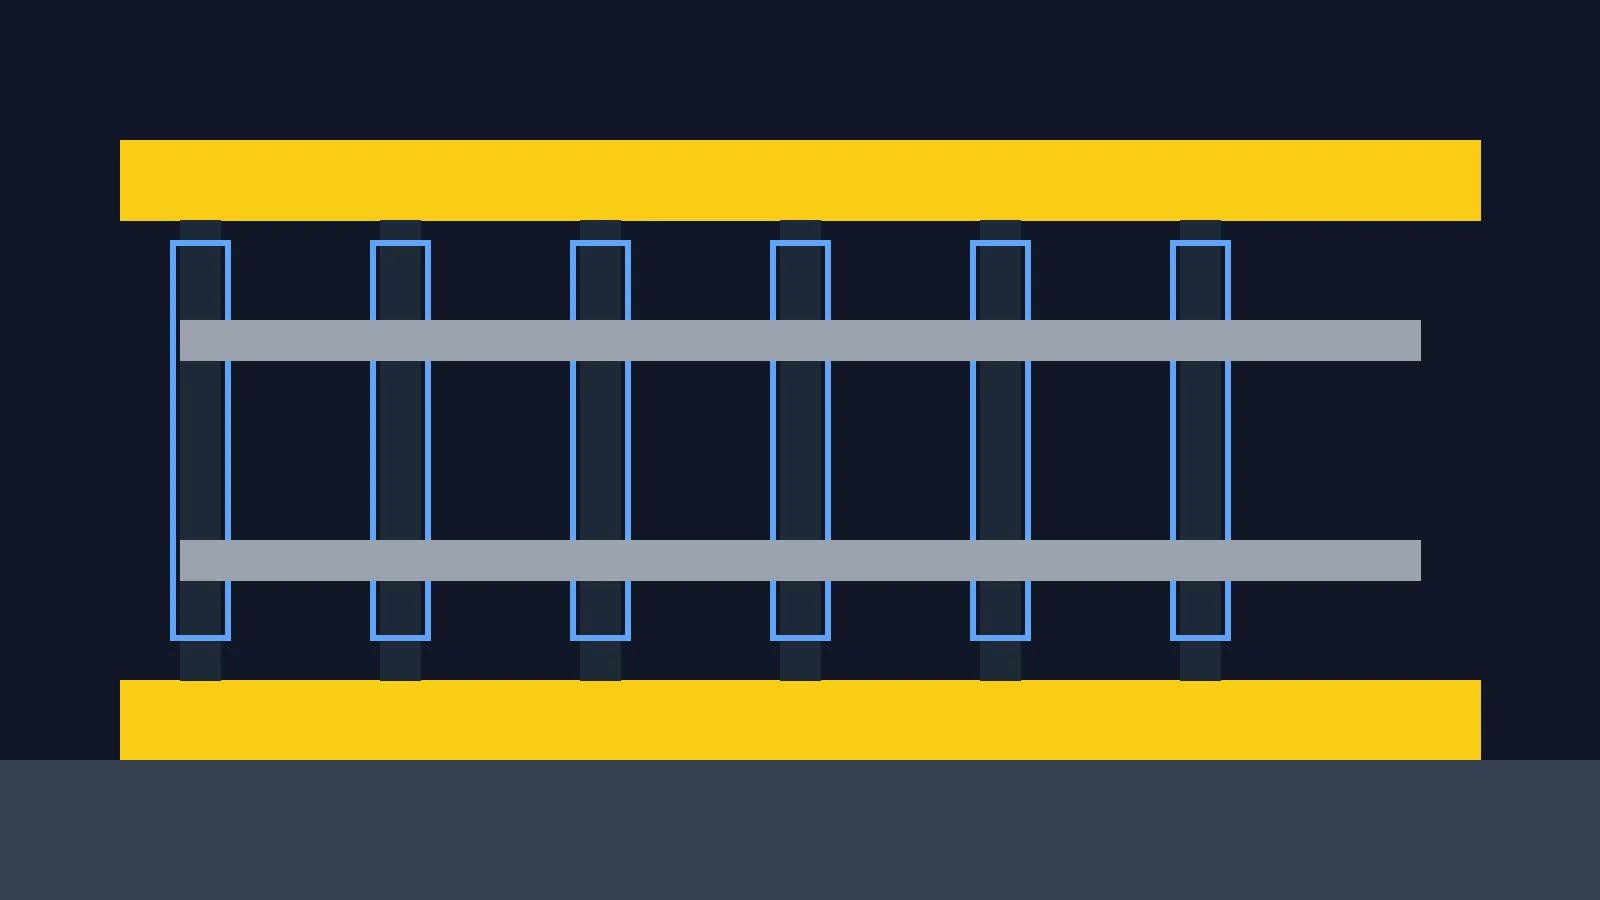
The key accessory: horquillas pladur
Hangers slide inside the main profile and allow it to be suspended using threaded rods or hang wires.
- Use: connect the main profile to the structural slab.
- Advantage: you fine-tune the height with a nut, ensuring a perfectly level ceiling that won’t sag over time.
Bottom line: invest in the chassis
The framing is what guarantees a renovation that lasts decades. There’s no point paying for premium acoustic boards if you install a channel 48 that leaves no room for insulation, or if you fit too few horquillas pladur on a large ceiling.
When you request a quote, ask about profile widths, the hanging system and the planned insulation. Now you know the terminology and what to expect.
Need professional pladur framing?
Our team installs channels, studs and suspended ceilings perfectly aligned so your partitions stay crack-free and your ceilings level.
Request advice